In Unity gradient effect is used for animating colors to achieve color blending. Color gradients, or color transitions, can be defined as a gradual blending of colors from one to another. There are different types of gradient uses in Unity 3D, based on the requirement the gradient in unity 3D can be achieved.
In this article, we’ll discuss how to use the gradient in UI such as Image, RawImage, and Text components. To apply gradient effects on the UI components we can create shaders and apply them to the components, but it requires good knowledge in using the shader scripts.
Also, it can be done using the following simple methods to do the same, with no coding idea of creating the shaders.
Method 1: Creating Gradient Image Resource
This is a very simple method that only requires the exact gradient image resource, but the width and height ratio of the resource should match with the UI component in pixel. This method best suits Image and RawImage components.
How to do:
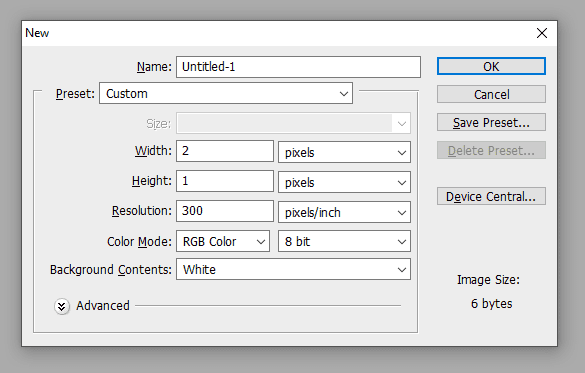
To do the gradient effect, first, create the image with the required ratio. For example, if the image is in 1024×512 then create an image with 2×1 Pixel with your color requirement. I’m using Adobe Photoshop to do this, you can use any tool that you wish to create the image.
READ: Change Color in Runtime – Unity 3D Tutorial
In Photoshop set up the grid to Pixel size, by changing it in the Preference->Grid. Then select a brush tool with a 1-pixel size and color it as you want. Below is an example of mine.

That’s it, now import this to your project and assign it the Image or RawImage component in Unity 3D to create the Gradient Effect UI. In Unity 3D convert the image to Sprite 2D asset and add it to the image component.
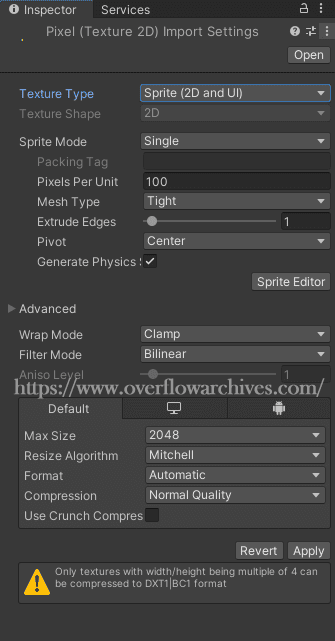
After changing the texture type add the image to the UI component, as follows.
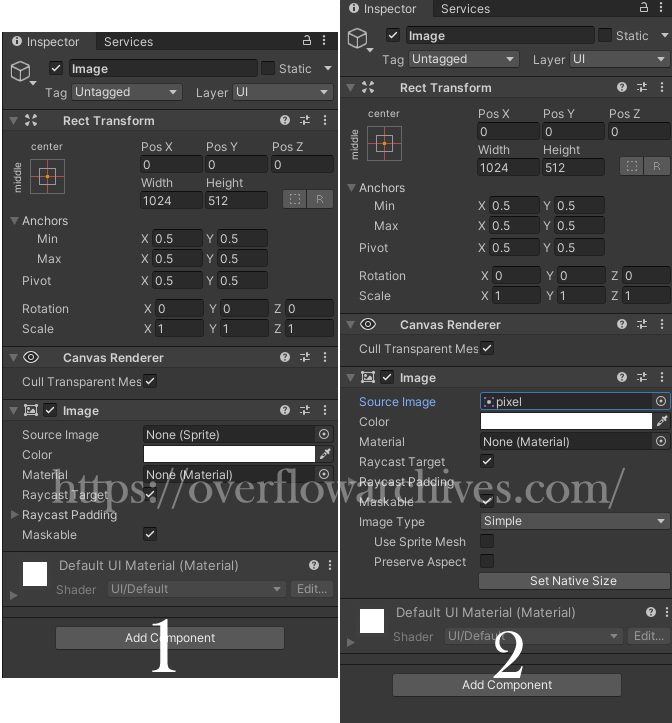
The output will look like this, check how the color transition is done in the component.
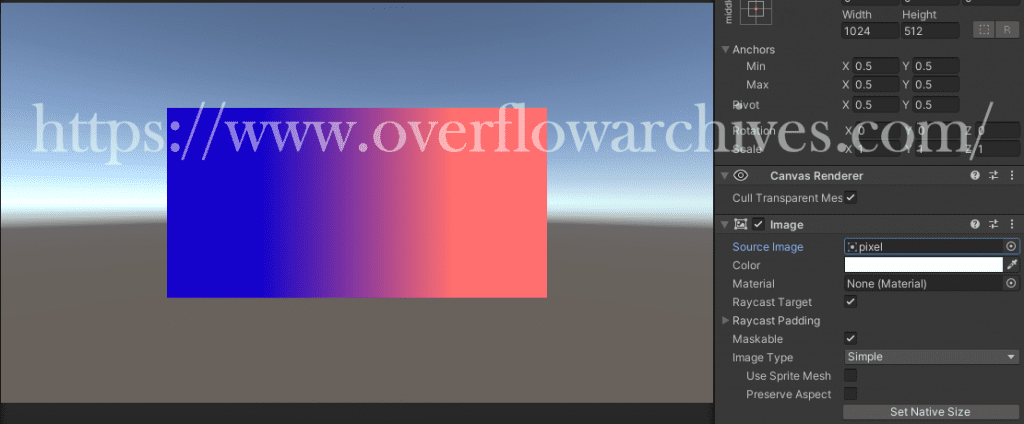
Similarly, you can use multiple colors to get a more attractive color gradient as you want.
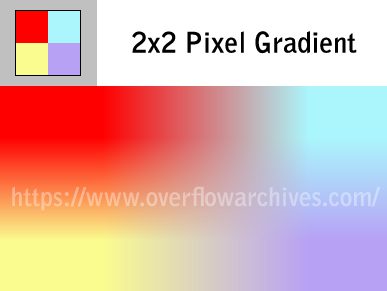
The above method is a simple and effective way to create a gradient effect in the Unity 3D UI and can be done using any image. Also, the image dimensions are low and it takes memory space. And this method also supports creating Sprite Gradient in Unity 3D.
Method 2: Using Third-Party Tools/Assets
There are plenty of assets available on the internet to create UI gradient in Unity 3D. Here I’m using one asset named Unity-UI Gradient.
To use this in the project download and import the scripts from the above link. After importing add the desired script to the component to create the gradient effect.
This Asset having four gradient effect script
1. UI Gradient
2. UI Corners Gradient
3. UI Text Gradient
4. UI Text Corners Gradient
Image Gradient Effect – UI Gradient
Create an Image Component and add the UIGradient script to it, add select the colors and adjust the angle to change the blending direction of the colors.

Image Corner Gradient Effect – UI Corners Gradient
This will let you select four colors that start from each corner.

Text Gradient Effect – UI Text Gradient
Use this script to add gradient effects to the Text components.

Text Corners Gradient Effect – UI Text Corners Gradient
To create a corner gradient effect in the Text use this script on the Text component.

Hope this post will help you to create the gradient effects in Unity 3D.


